Screenshots
On this page you can see several screenshots of SlippyClerk. The screenshots are available for the operating systems Windows 10 and Windows 7. You can switch the shown operating system with the links under the screenshots. The screenshots show the SlippyClerk in its three modes for writing number sequences, letter sequences and multiple sequences. The mode can be selected by clicking on one of the tabs at the top of the program.
Number Sequences
The following screenshot shows the SlippyClerk writing the odd number sequence from "Page 001" to "Page 027".
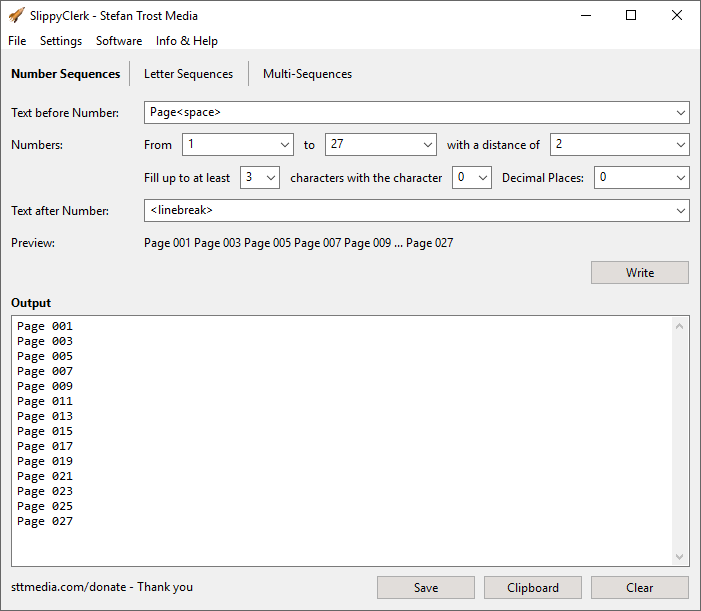
In the settings you can see how a number series from 1 to 27 with a distance of 2 was defined. In front of each number, the text "Page
In the preview below the settings, you can already see how your row will look like when you change the fields. You can then click on "Write" to write the sequence to the output. Below this you have the option of saving the series, copying it to the clipboard or deleting it.
Letter Sequences
Similar is the mode "Letter Sequences", which you can reach via the tab of the same name. In this example we want to write a series of letters from A to BB.
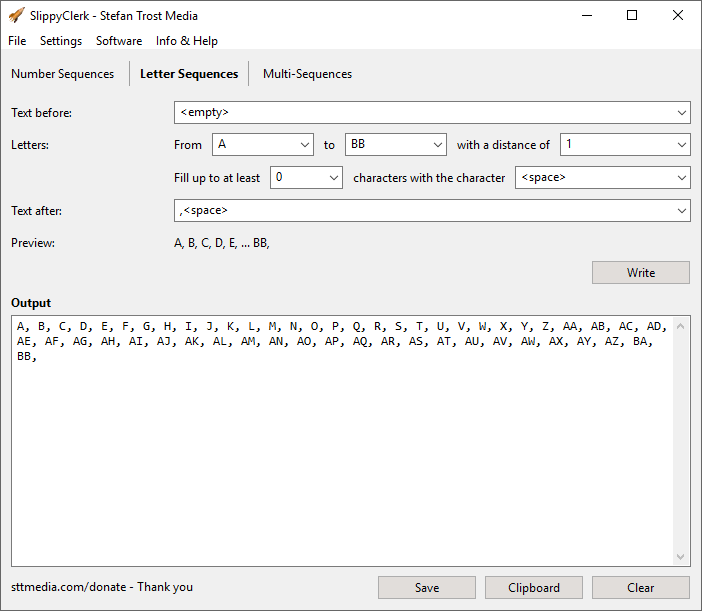
Instead of the numbers, we have therefore defined a series from A to BB. Since we do not want to skip any letters this time, the distance is 1. We did not define a text before or a padding in this case, but a comma and a space after each element.
Multi-Sequences
The Multi-Sequence mode offers the greatest possible flexibility. On the top left, text elements, number sequences and letter sequences can be defined. Afterwards they can be added to the elements box on the right side with the button "Add". These elements will then be written consecutively as many times as set in the box "Repetitions" under the elements box. When clicking on an existing element, it is loaded again into the settings on the left and can be added via the button "Add" again or replaced with the button "Replace" with the old selected element after editing.
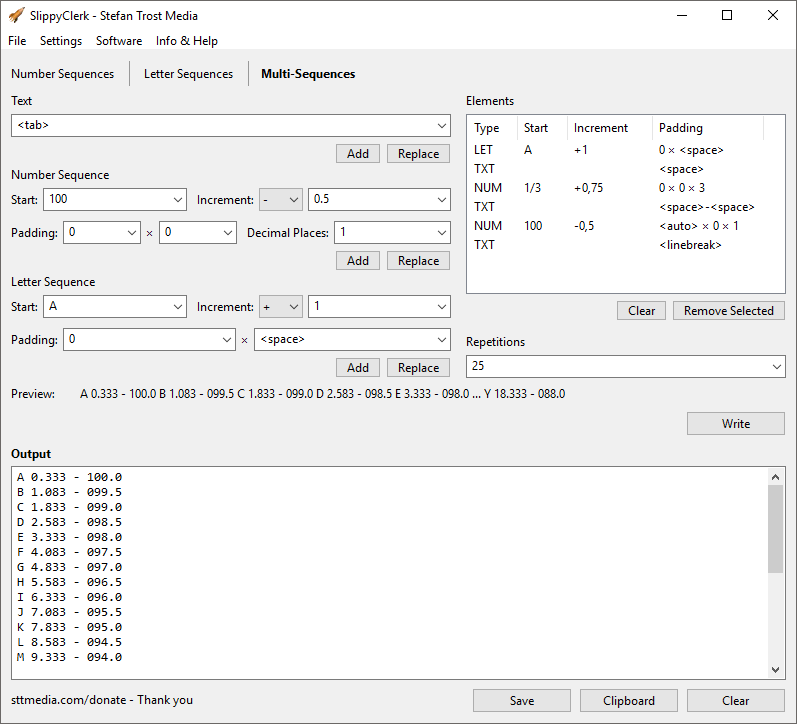
In our example, we have defined six different elements, which contain all element types: an ascending letter sequence in the first place, an ascending number sequence with three decimal places and an increase of 1/3 in the middle, and a descending number sequence with one decimal place at the end.
Old Screenshots
Screenshots of the old version of SlippyClerk can be found here.
Note
The screenshots were created with the Clipboard Saver. With this tool, you can automatically save screenshots in any format and you can also simultaneously scale or otherwise edit the graphic according to your wishes.