Screenshots
On this page you can see several screenshots of the ClipboardSaver. The screenshots are available for the operating systems Windows 11 and Windows 7. You can switch the shown operating system with the links under the screenshots.
In the following first screenshot below you can see the main window of the ClipboardSaver. On the left side of this window you see the history of the recent clipboard contents with the option to add this content to the clipboard again.
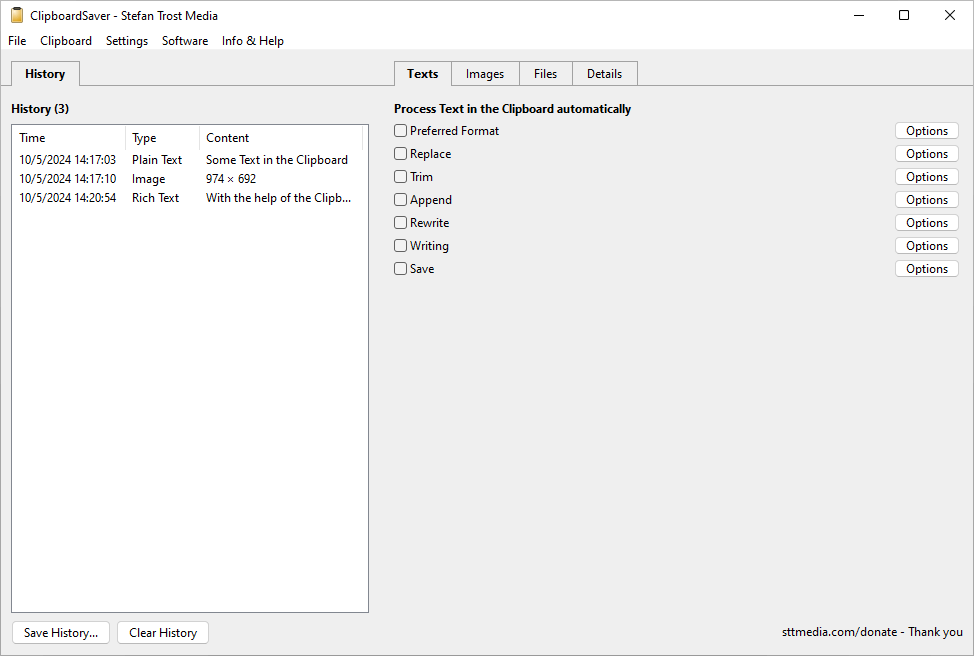
On the right side of the main window you will find the tabs "Texts", "Images" and "Files" to save or change content of this type in the clipboard, as well as the tab "Details", which shows you the current content of your clipboard, including all the formats currently available in it.
Change and Save Text Content from the Clipboard
The ClipboardSaver allows you to save text of any preferred text format from the clipboard as a file, as well as to rewrite it according to several rules, to change its writing, to append any other text at the front or the back of it, and to perform one or multiple replacements. If one or more of these actions are activated, they are carried out automatically as soon as text content is copied to the clipboard.
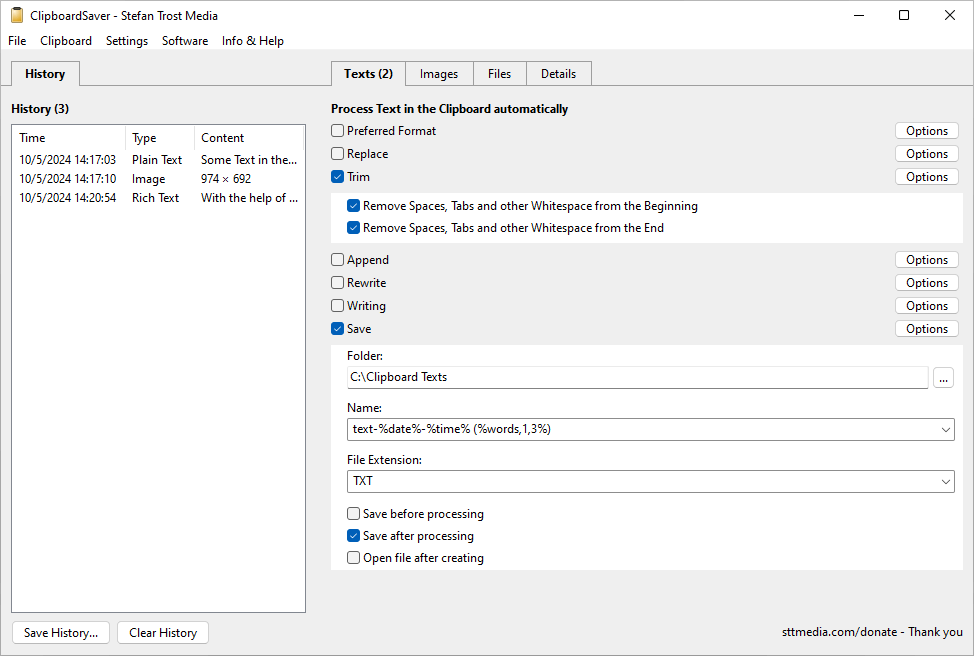
In the screenshot, two actions for text editing are activated. On the one hand, the text is freed of whitespace such as spaces or line breaks at the front and the back using the "Trim" action, and on the other hand, the clipboard content is automatically saved after editing. Within the file name, we use the placeholders %date%, %time% and %words,1,3% to dynamically write the current date, the current time as well as the first three words of the saved text into the file name. Since we have not selected a "Preferred Format", Plain Text is used.
Change and Save Image Content from the Clipboard
The same way as the actions for editing and saving text content are located on the tab "Text", the actions for manipulating and saving image content can be found on the "Images" tab. In addition to the option of saving image content as a file, you can also automatically crop, rotate, mirror or resize the images in the clipboard. The activated actions are carried out automatically as soon as image content is copied to the clipboard.
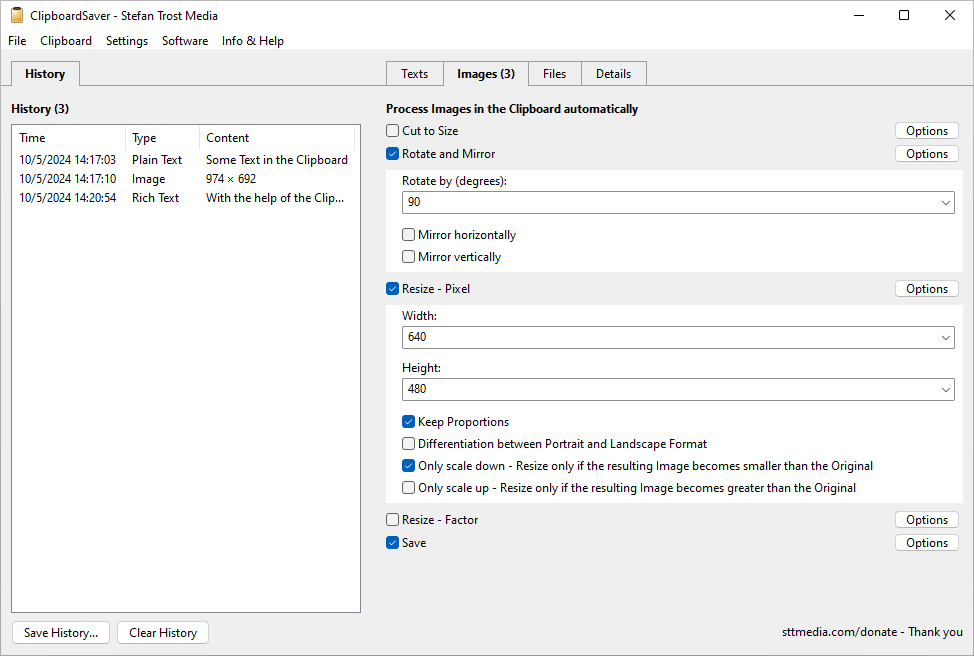
In the screenshot we have selected three different actions: First we rotate the images by 90 degrees, then we scale the images to a size of 640 x 480 pixels. However, such a resizing should only take place if the resulting image will become smaller than the original. This means that if our clipboard content is already smaller than 640 x 480 pixels, the image should remain as small as it is and not be enlarged to 640 x 480 pixels. As a third action, we have also activated saving the images. This action is hidden in the screenshot, but is similar to the text content storage that we saw in the previous screenshot.
Current Clipboard Contents
The tab "Details" allows you to view the current contents of your clipboard as well as to take a closer look at the content saved in the history. In the upper part you will find a list of all available formats. When you select one of these entries, the stored content is loaded into the text field below.
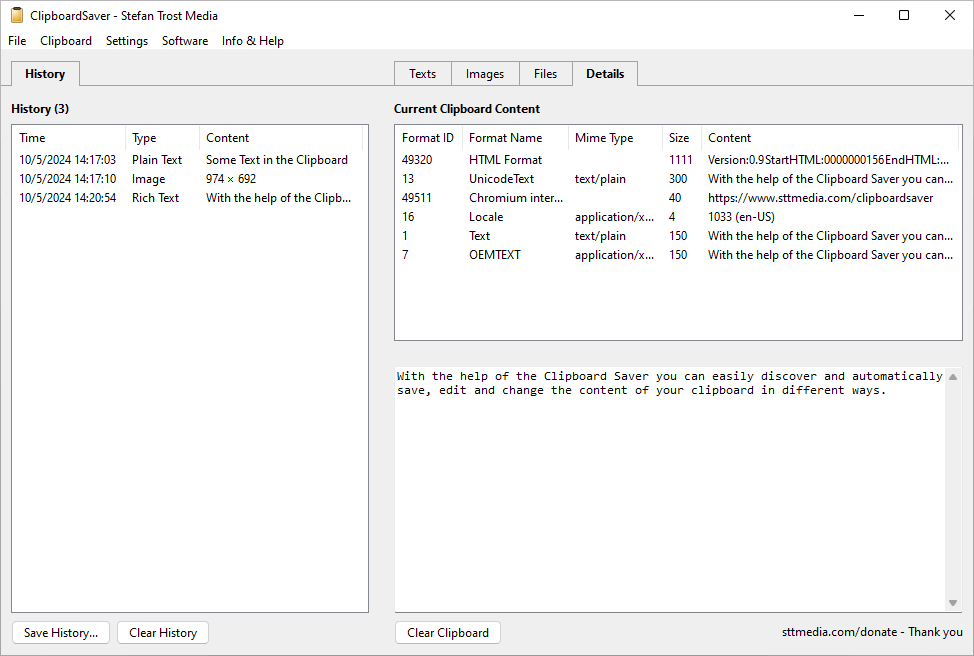
In our screenshot, we copied a text from this website to the clipboard via a browser (from Chrome in the Windows 11 screenshot and from Firefox in the Windows 11 screenshot). Browsers usually do not just copy such content to the clipboard as plain text, but also store some additional information such as the URL or the text formatted in HTML format. With the help of the ClipboardSaver, you can explore, view and save this content. If you need some test material: especially Office applications copy a particularly large number of different formats to the clipboard.
Old Screenshots
Screenshots of the old version of the ClipboardSaver can be found here.
Note
The screenshots were created with the Clipboard Saver. With this tool, you can automatically save screenshots in any format and you can also simultaneously scale or otherwise edit the graphic according to your wishes.