Screenshots
On this page you can see several screenshots of the ImageResizer.
Select Images
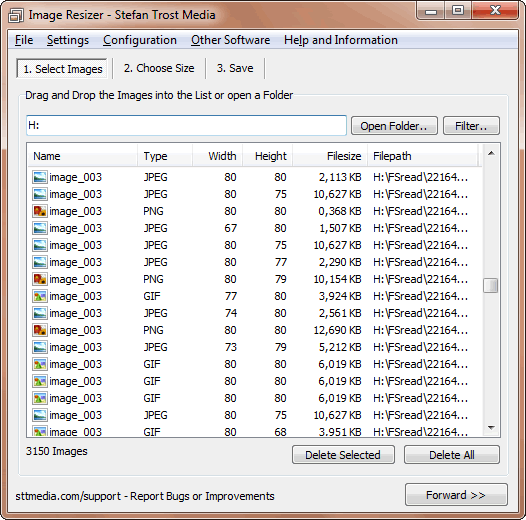
First, you have to select the images to be resized. You can simply drag and drop the images to be scaled from any folder of your computer onto the Image Resizer or you can open a folder as shown in the screenshot. Later, the size of all pictures in this list will be changed.

Choose Size
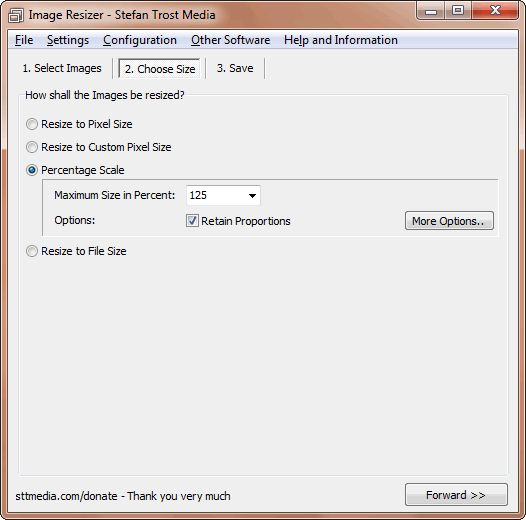
With "Forward" you can go to the next step. Here you can select how the images should be resized. You can resize according to a pixel size, percentage or to a desired file size. In the screenshot it is resized to 125 percent with proportions. If you disable the "Retain Proportions" box, two separate boxes will be displayed for the width and the height.

Save
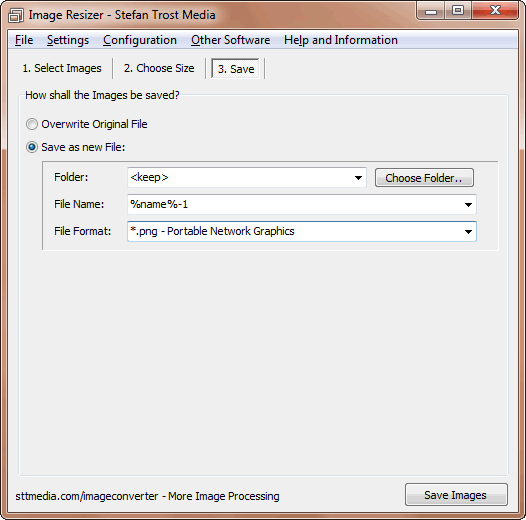
In the last step you have to select how to save the images. The old images can be overwritten or you can save the images as new files. In the screenshot, the images will be saved in the same folder as the old ones, the format will be changed to PNG and the string "-1" will be added to the old file names. If you click on "Save Images", the images currently in the list will be resized and saved according to the specified settings.

In the help section, you can read about the options and settings and how to resize images with the Image Resizer in detail. A list of all functions can be found on the page functions.
Note
The screenshots were created with the Clipboard Saver. With this tool, you can automatically save screenshots in any format and you can also simultaneously scale or otherwise edit the graphic according to your wishes.