Old Screenshots
Note
This page shows screenshots of an old version of SlippyClerk.
You can find the screenshots of the current version here.
On this page, you can see two screenshots of the Slippy Clerk. The first one shows the Slippy Clerk in its standard mode and the second picture is taken from the advanced mode. In this mode you can carry out more attitudes.
Standard Mode
In the first screenshot you can see all settings to write a row like Page 1, Page 2, Page 3 up to Page 10. Such rows can be written best in the standard mode. Here you have a sequence of numbers with a start and an end point and the possibility to count this sequence in a certain distance. In addition you can indicate which text should come before and after your number.in this case the text before is "Page<blank>" and the text after is ",<blank>". On the screenshot you can see, that there is a preview and you can write the lines next to each other or among each other.
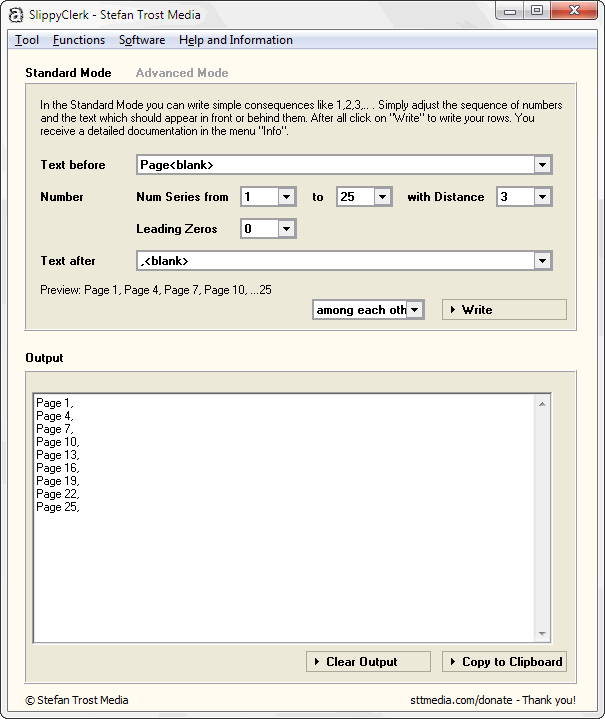
If all these settings were carried out, you can click on "Write" to write the text in the output.
Advanced Mode
The next picture shows the Slippy Clerk in the advanced mode. This time it is counted 10 times from 100 in the distance of 10 and between the numbers there is the sequence "<blank>and<blank". As you can see on the picture you can produce as much texts and rows as you want. You can add this with the button "Add" and then it will appear in the box "Elements", where it is also possible to delete some of the elements again.
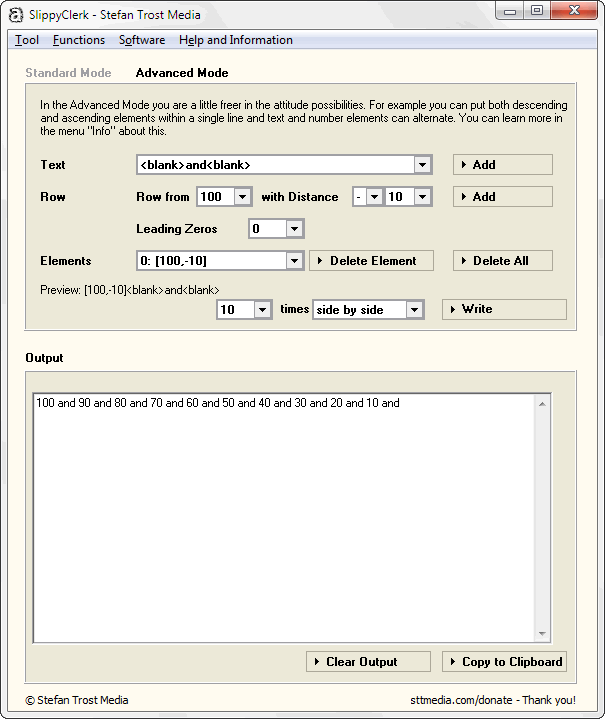
The preview and all other functions are not different from the standard mode. Depending on which tasks you want to take out, either the standard mode or the advanced mode is suitable.
Note
The screenshots have been created with the Clipboard Saver. With this tool you can automatically save screenshots in an arbitrary format and you can concurrently scale the images to your desired size.