Screenshots
On this page you can see several screenshots of FasterFiles.
Manage HotKeys
As soon as you have created your first HotKeys, Action Lists and Actions, they are displayed in the main window from where you can manage and change them.
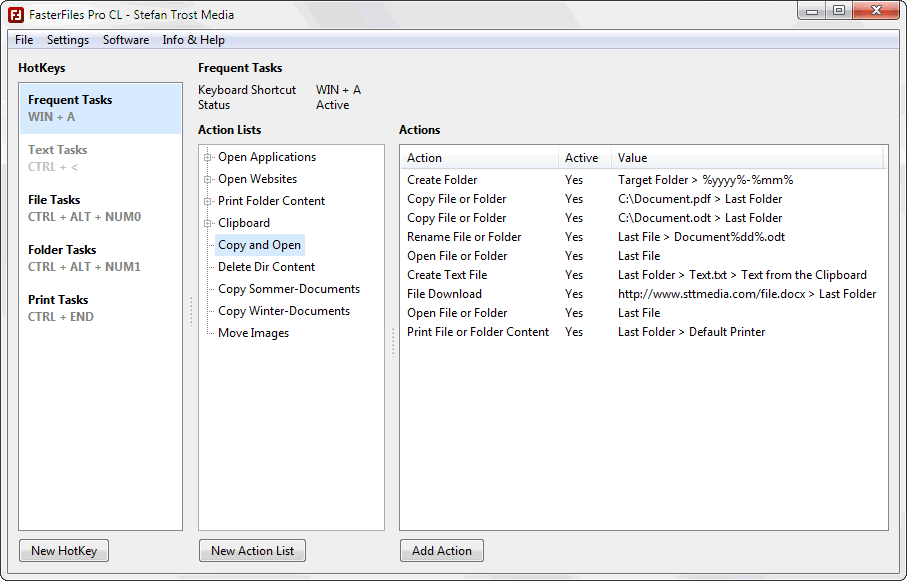
In this screenshot, the HotKey with the keyboard shortcut WIN + A is open. We have assigned some Action Lists to this HotKey, among others also some folders in which action lists can be bunched together.
The action list that is currently selected, first creates a new folder in the target folder (that is the currently opened Explorer window). The name of the folder is containing placeholders for the current year and the current month. Next, files are copied to the recently created folder. Because the name of the folder is variable (because of the placeholders and the Explorer origin) we are referring to the "last folder" instead of specifying any exact name. Subsequently, the last file (here Document.odt) will be renamed and opened, a text file containing the current content of the clipboard will be created, a file is downloaded from the Internet and last, the entire content of the just created folder is printed out via the default printer.
Create HotKeys
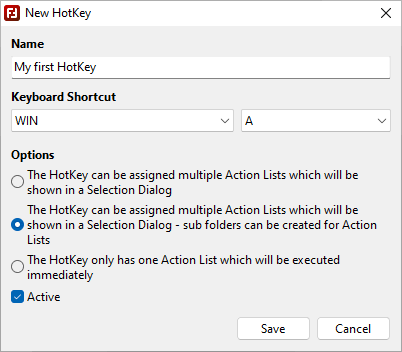
In order to create a new HotKey, you can click on the button "New HotKey" in the main window. This will make the following window open.
Windows 11 - Windows 10 - Windows 7
In this window, you can specify the name of your HotKey, you can determine which keyboard shortcut should execute the HotKey and you can adjust some other HotKey settings.
Create Action Lists
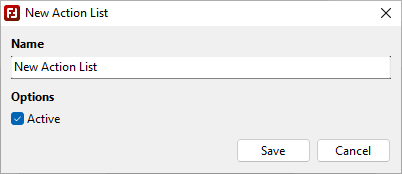
After you have created a HotKey with Action Lists, you can select the HotKey and click on "New Action List" in order to assign an Action List to the HotKey.
Windows 11 - Windows 10 - Windows 7
Later, you can click with the right mouse button on a HotKey or an Action List to edit or delete them.
Create Actions
In order to create Actions, first, you have to select the HotKey and the Action List to which you want to assign the new action. After that, you can click on the button "Add Action".
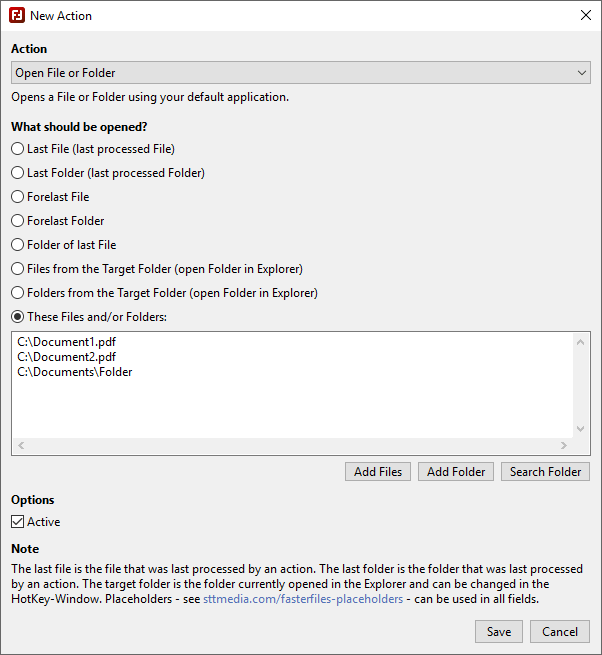
At the top of the window below "Action", you can determine the kind of action. The screenshot is showing the action "Open File or Folder". Here you can specify under "What should be opened", which files and/or folders should be open. With options like "Last File" or "Last Folder" you can dynamically access the files and folders that were last processed by FasterFiles without knowing their names when creating the list.
Edit Actions
The created actions will be displayed in the list "Actions" in the main window. To edit them, right click with your mouse on one of the actions and select "Edit" from the context menu.
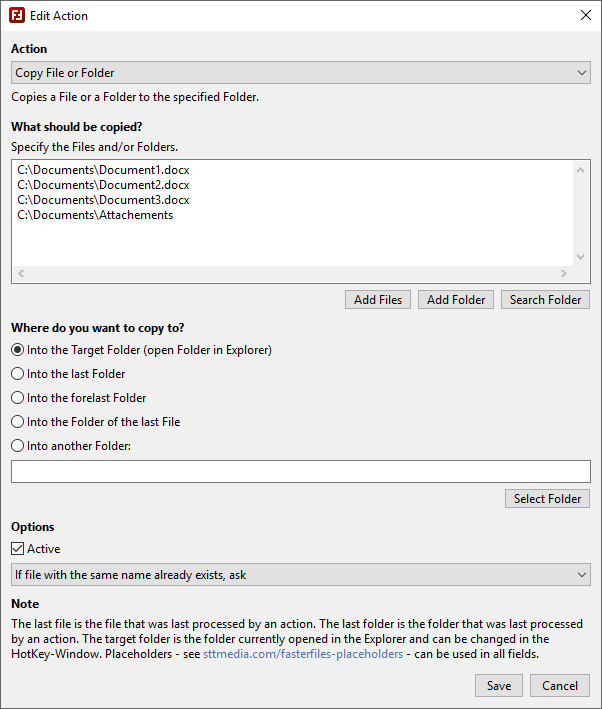
The screenshot is showing the action "Copy File or Folder". When creating this action, you can first define what should be copied and after that to which folder. Last, there is an option with which you can control the what should happen, in case that a file to be copied is already existing. The action in the screenshot is configured in a way that the program should ask in this case.
Execute HotKeys
After you have created a HotKey and after you have assigned Action Lists and Actions to it, you can press the selected key combination and you will get some kind of selection dialog like you can see in the following screenshot.
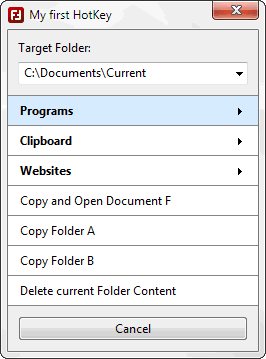
In this case, a HotKey with the three folders "Programs", "Clipboard" and "Websites" as well as some other first level action lists has been created. Now, you can use your mouse on your keyboard to select one of the action lists and thereby execute the assigned actions of the list. The target folder at the top of the dialog is set to the current open Explorer window by default. If multiple windows are open, they are displayed with a drop down list as you can see in the screenshot. However, it is also possible to change this manually. You can directly refer to this target folder as location for actions within your action lists.
More Screenshots
You can find more screenshots of Faster Files on the help page, where the creation of HotKeys, Action Lists and Actions is described step by step.
Note
The screenshots were created with the Clipboard Saver. With this tool, you can automatically save screenshots in any format and you can also simultaneously scale or otherwise edit the graphic according to your wishes.